Good grief Peter
Even your yard sale bikes look like showpieces
Well done matey
Steve
It’s a curse Steve! ![]()
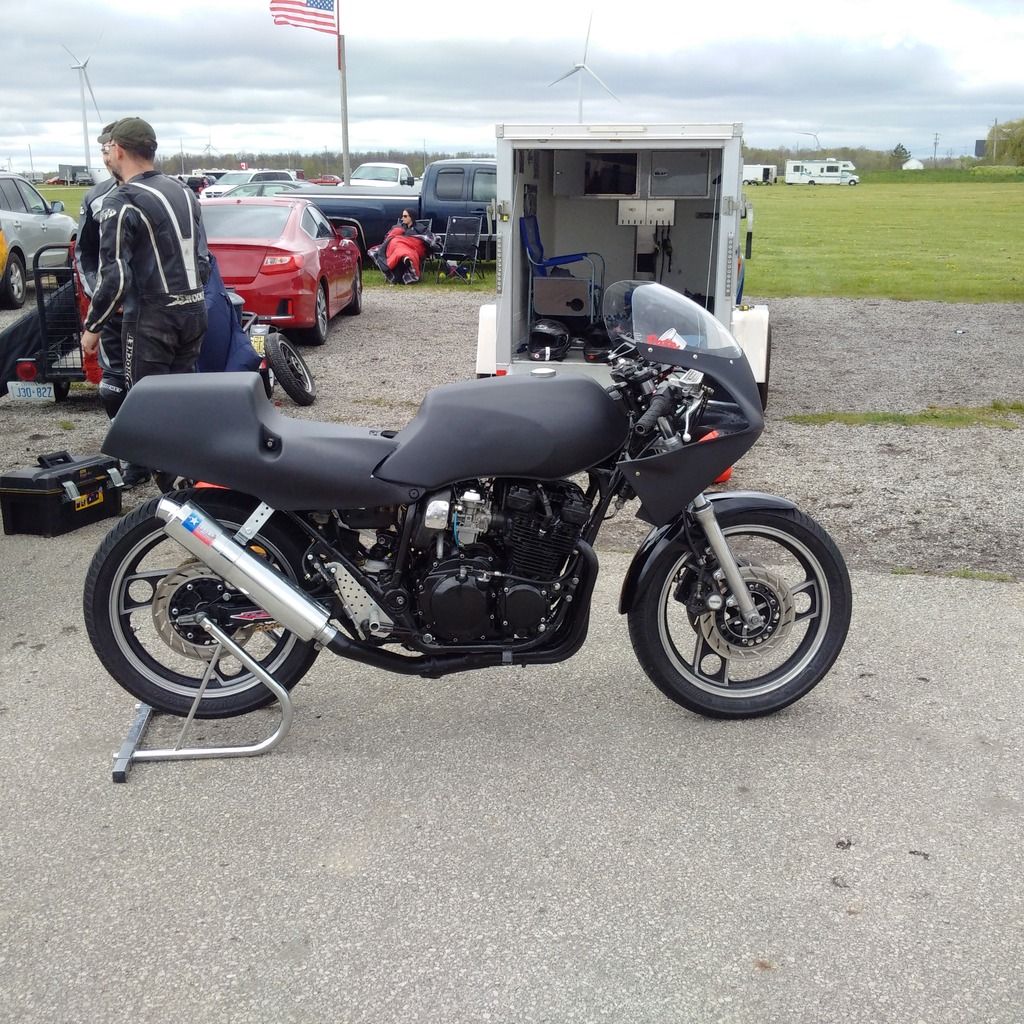
So, I have a bunch of very used TZ bodywork I’m thinking of using on this project. This does 2 things, makes the bike look a little more unique and gets more crap out of my basement. They are too beat up to put on my TZ so the “junk yard dog” is going to get them! ![]()
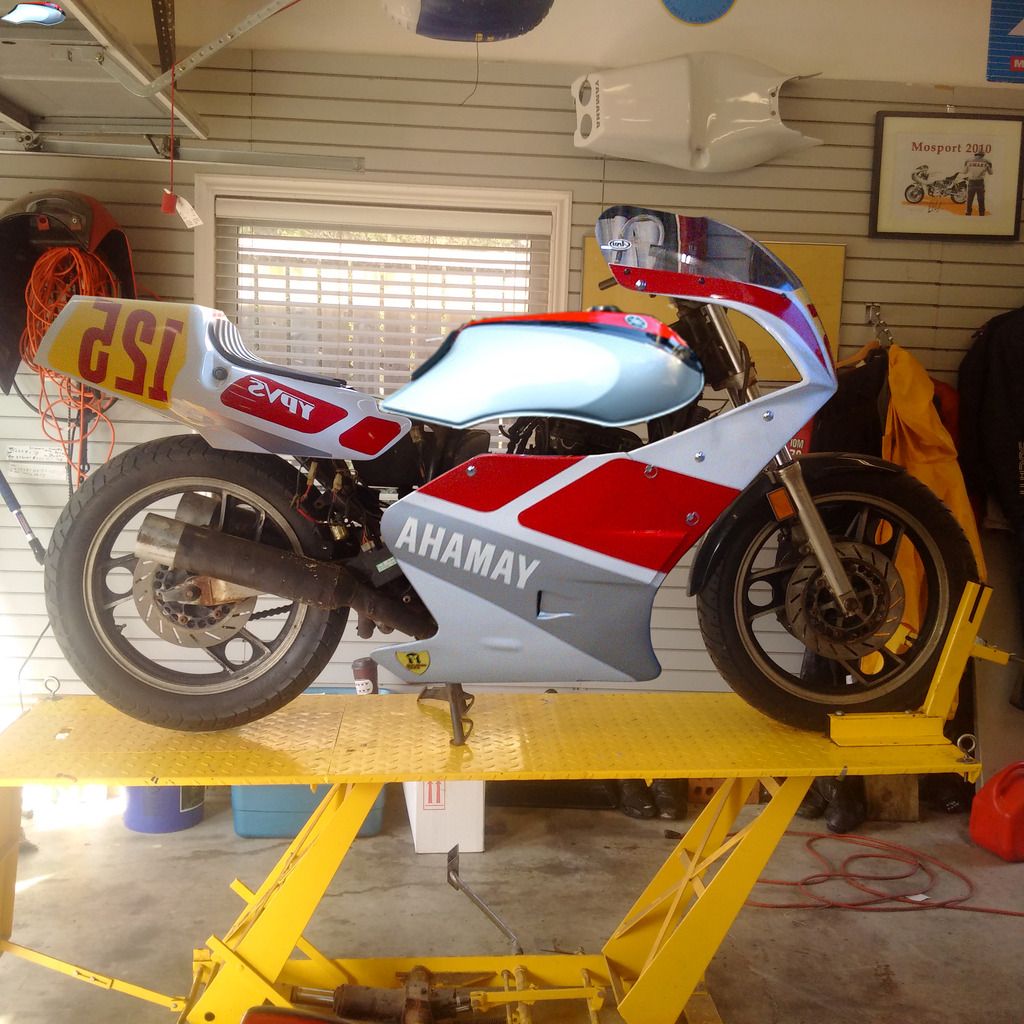
I played around with photoshop and created this concept photo…I think my plan should work! (note the new bike make) ![]()
I like it.
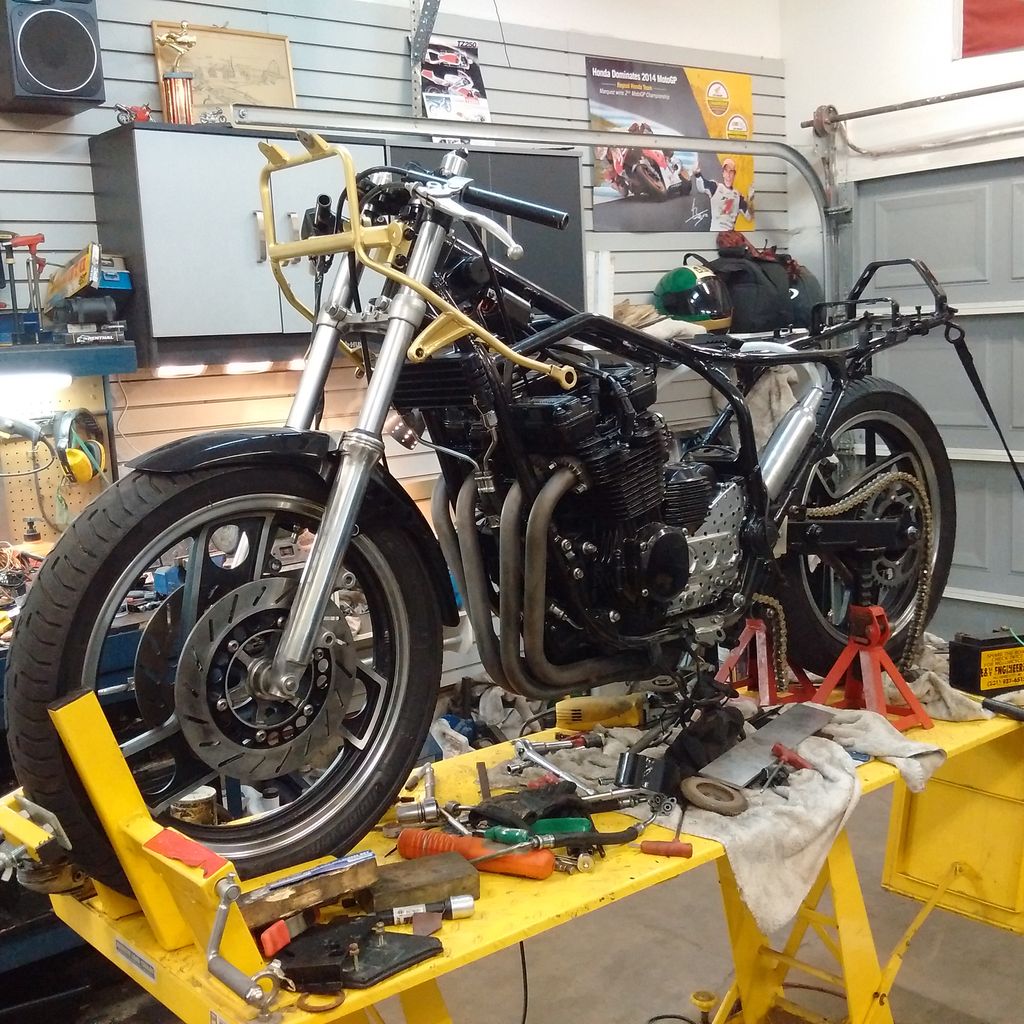
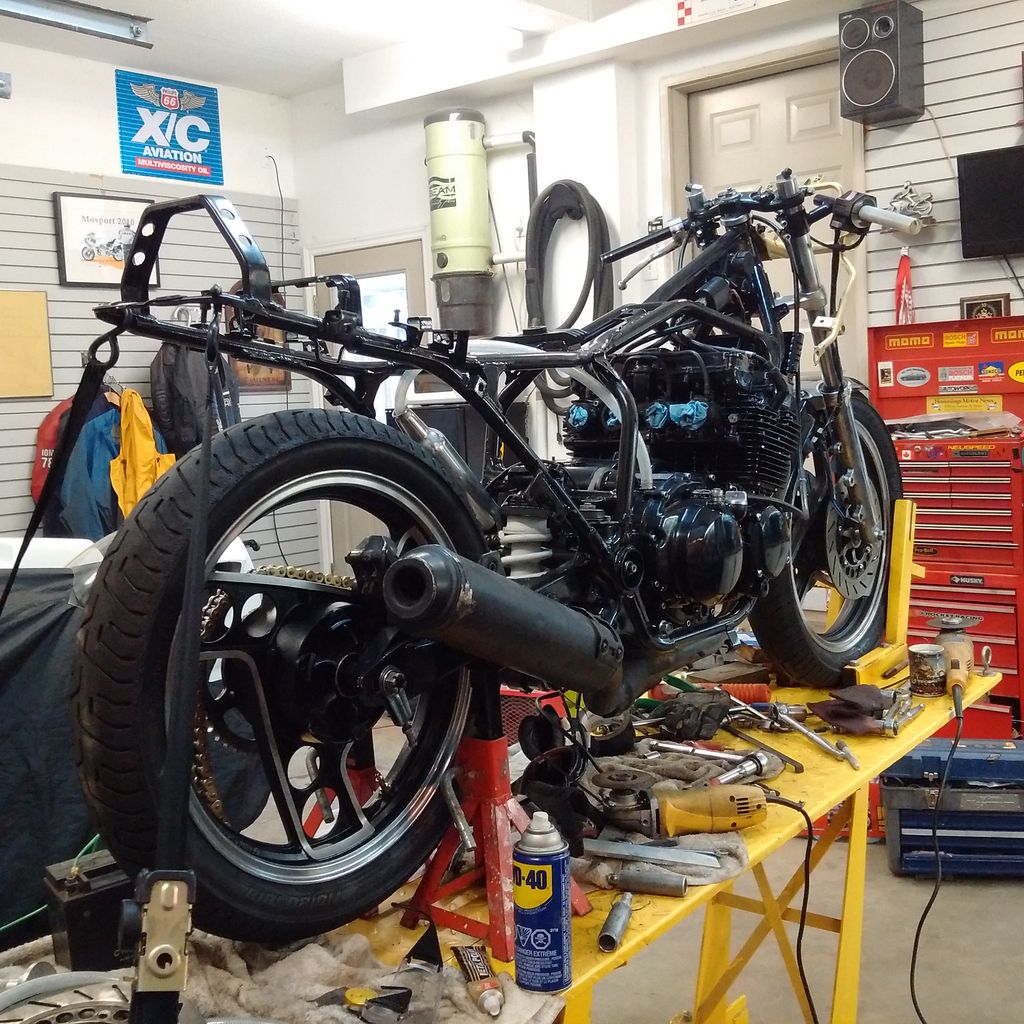
Got a few projects done, forks rebuilt, nice surprise is some previous owner upgraded the springs to progressive style…bonus! The fork seals were toast but otherwise in good shape. Bearings replaced in the swing arm. The rear mono shock seems to work and is not leaking so we will give it a try.
Front wheel had bad bearings so we replaced those. Having a problem seating the bead on the rear Avon tire…we have tried everything. Anybody have a good way to seat a tire bead?
The tank cap had no key so with some drilling and fancy manipulating we finally got the cap off. The inside is not too bad, some surface rust but think we can clean most of it out. However, the cap did not survive.
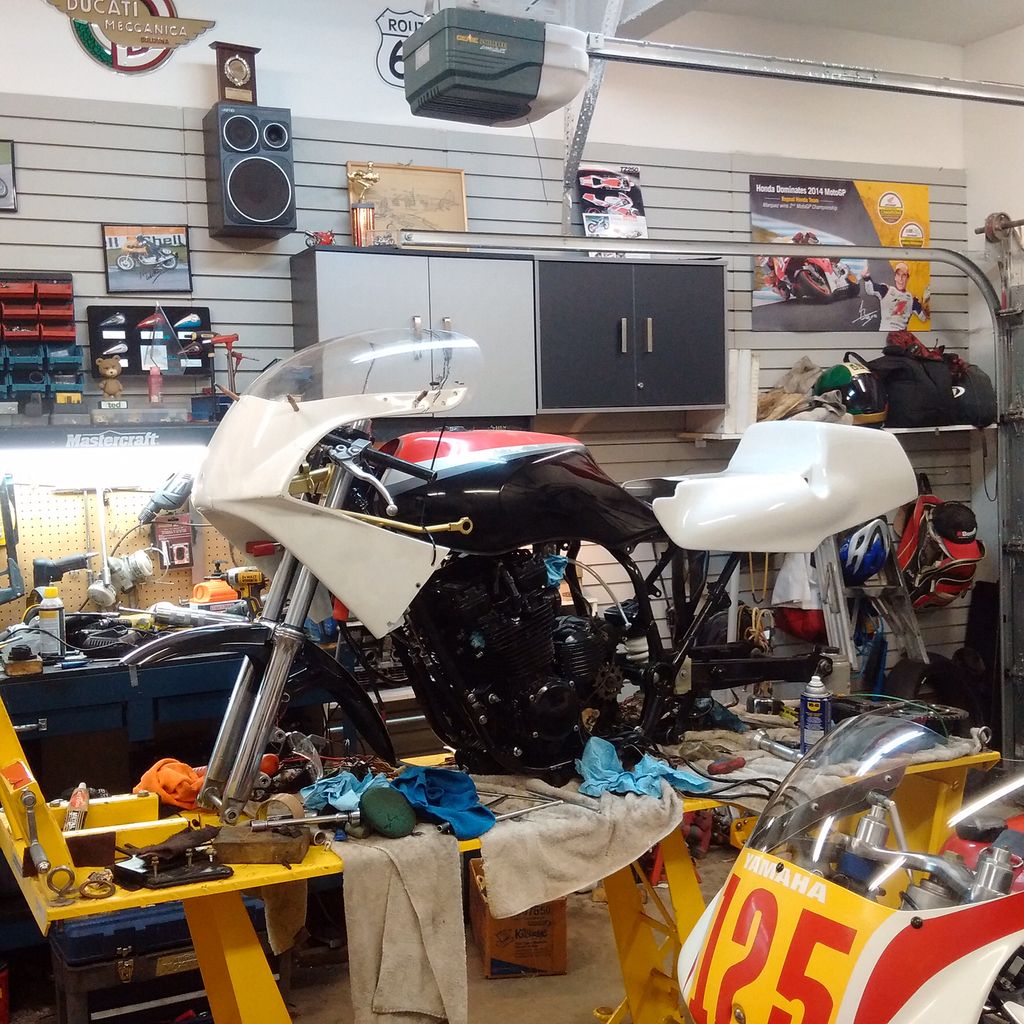
It looks like some trimming we will be able to get the old TZ parts to work.
Following with interest Peter. Looks great so far. The TZ bodywork will add 10 horses for sure!
This is probably not going to help much at this time of the year, but if the tire hasn’t seated yet, at the bike shop where I worked we used to put lots of liquid soap on the bead and rim and inflate them to about 50lb PSI and put them out in the sun. The warmth seemed to soften them and after a while they would seat with a hell of a pop, which always made me jump. Try with the tire nice and warm as June is a long way off.
Dave.
Hello I had a hell of a time seating the bead on a Hiedeneau rear tire.What finally worked was tire lube and inflating the tire with the valve core out.I hope this works if you haven’t already succeded. Wilf
When all else fails, just beat the tire with a hammer. And I mean till it’s black and blue… but mainly black.
Deflate, lube the rim base with Crisco, soap bead and mount as per normal. It’ll bead right up.
… my 2 Cents ( Canadian ) … put a Ratchet Strap around it and tighten …
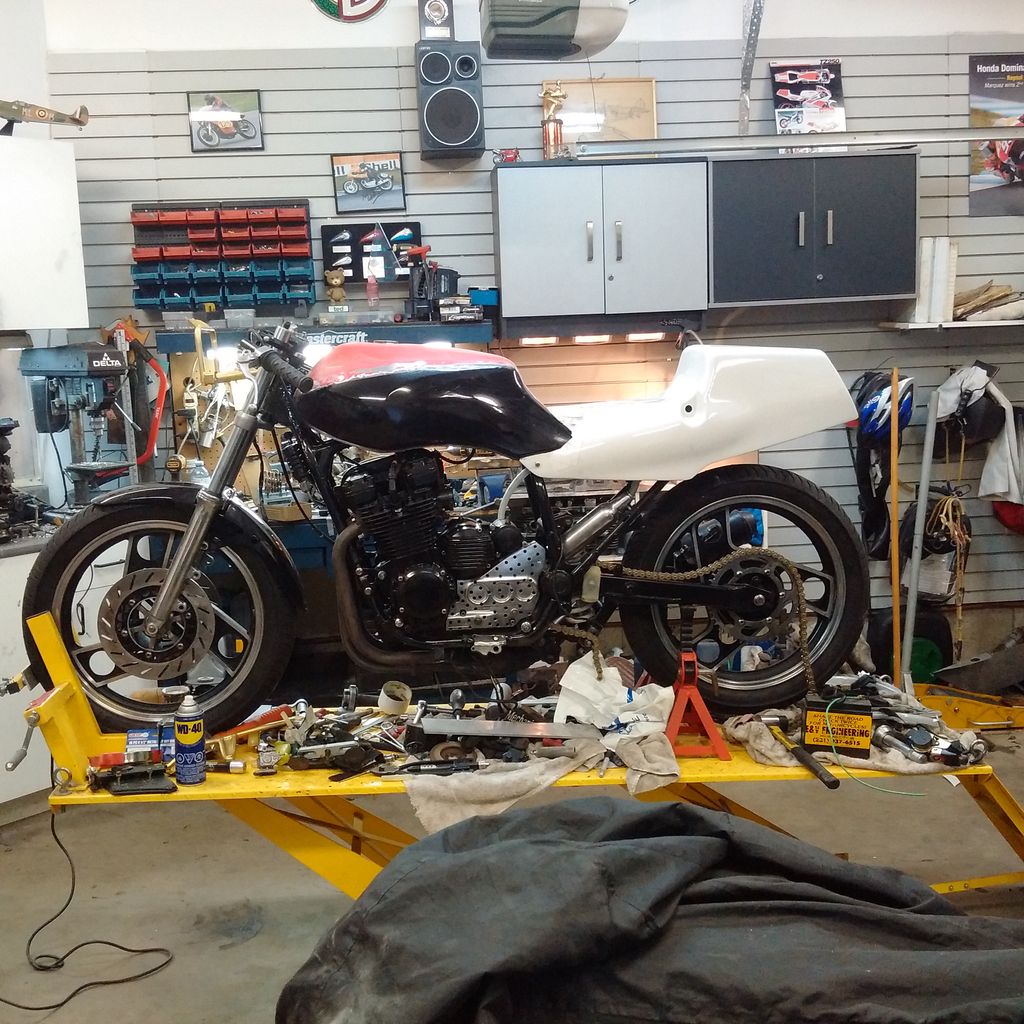
The project is finally on its wheels and starting to look like a bike! We discovered the rear tire had a good size hole in it which explains our difficulty trying to seat the bead. So, I mounted another tire I had which will work until we find a suitable replacement
We also mounted the FZ600 exhaust which fits fairly well after a little trimming off unnecessary centre stand mounts. I would like to replace the can with a lighter aftermarket unit but this will work for now.
We need to sort the brake situation out. We have a line for an entire front end with serviceable brakes for $80 which hopefully will speed up the process. The main focus will to rebuild the carbs and sort out the wiring to see if we can get the beast running…stay tuned!
Yes, I’ve heard that tires without holes are the way to go.
Boy, I bet all the people who gave you bead seating advice feel dumb now! Ppphhhfffft -Crisco - ratchet straps…
Looks like the old TZ seat will work perfectly, just need to weld up some support brackets and we’ll be good.

I love this whole idea.
I see a new chain in the last shot- time to update capital outlay list.
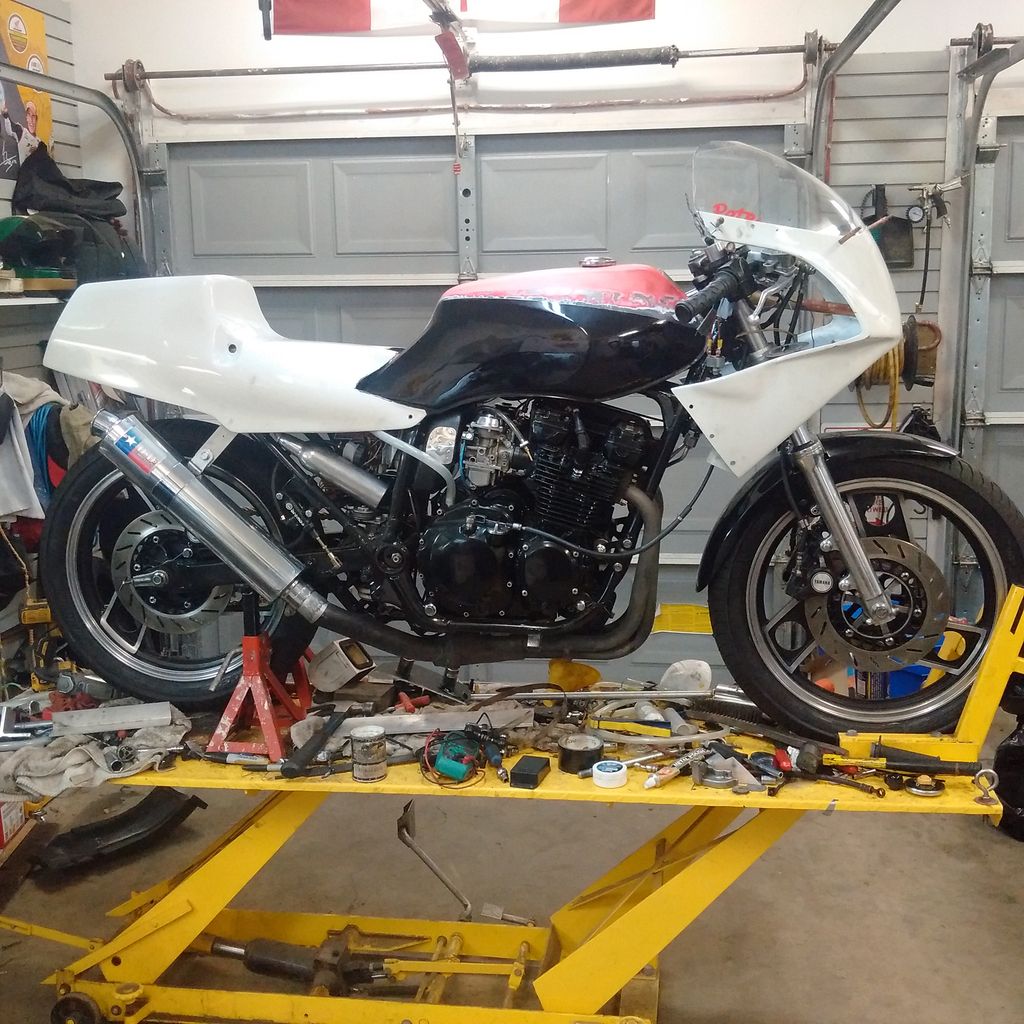
Chain was 3 links too short. ![]() I have a line on another one for a barter deal. I need to update the build cost list, we have spent a bunch more $$ since the last instalment. She is almost ready to start, just waiting for a few items. Big jobs left are to build some rear sets, finish wiring, build the dash, mount the battery, build a seat mounting frame, mount body work, clean up the body work and paint.
I have a line on another one for a barter deal. I need to update the build cost list, we have spent a bunch more $$ since the last instalment. She is almost ready to start, just waiting for a few items. Big jobs left are to build some rear sets, finish wiring, build the dash, mount the battery, build a seat mounting frame, mount body work, clean up the body work and paint.
Time is ticking by, tons to do and only a month or so before the vintage track day weekend where we hope to run it. We might make it… ![]()
There have been quite a few jobs done on the old FJ since the last update. The carbs have been rebuilt and installed. The front brakes have been fixed up, installed and bled. Battery tray was fabricated and installed in the tail section. Replaced the rusted muffler with a D&D kijjii find, still have some fabricating left on the header. The bike has been started and runs surpringly well. A new chain has been installed. We still have lots to do but hopefully will have it ready for the vintage track day in May.
It’s coming along nicely, Looks good.
Thanks Mark, it’s getting there. I forgot how much work it is to build a race bike, good thing I enjoy the process. ![]()
Well, we finally got the FJ on the track and things went pretty well for a new build. We have a few things to sort out but most are pretty minor. Its currently just in primer and we plan to paint it and get the numbers installed. Still need to install the belly pan and finish all the safety wire work. We hope to be ready for the TT! So far the total cost to build is about $1700.00. The moral of the story, buy a bike already built! If you had to add the hours of work it takes to build a race bike it would make way more sense to buy one prebuilt. Although, if you like wrenching its a fun pastime and a great way to learn a bike inside out.